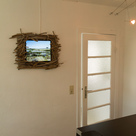
DIY: Digital picture frame
I love to travel and I love my photos of these journeys. I always wanted a digital picture frame to view them, but everything available sucks: The displays are small, they aren’t very stylish, they aren’t cheap and the picture display time is waaay to short for my liking. So I built one myself.
Construction
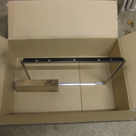
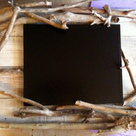
We had an TFT laying around of such bad quality, that you got eye cancer after five minutes of reading text on it. Full screen images looked all right though. I took it apart and only kept the parts I needed. The main goal here was to get the display as thin as possible. The inner aluminium frame was too shiniy, so I painted it black. Lastly I mounted it on a wooden frame, glued the electonics on the back and decorated it with sticks.
The first version used my iPad as a driver. I hacked together an app which downloaded the photos provided by a Sinatra server running on my MBP and displayed it on the external display with smooth transitions. It had guesture support for zoom modes and changing the photo. The VGA adapter needed to be modified, to supply power at the same time.
This is what the intermediate result looked like
The obvious drawbacks were the bunch of ugly cables ruining the look and the need for an iPad, which I recently gave to my mom. No iPad, no pictures. Time for revision 2.
Revision
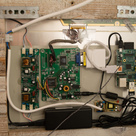
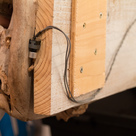
This time I hot glued a Raspberry Pi as driver, along with both power supplies to the back. I also added a switch to the P6 header on the Pi, to be able to restart it after a shutdown. The Pi is connected to the WiFi, announces it’s network name via Bonjour and opens a network share.
Lightroom on my MBP has a publish service configured to export directly to the Pi’s network share. The Pi boots to GUI mode and auto runs a Ruby Gosu-Webrick hybrid app. Gosu to display the photos, Webrick to have a web interface to select photos and shutdown the Pi. The source code is hosted on GitHub.
I’m pretty happy with it. The look is nice and clean, it’s easy to add new photos and with only a little bit of scripting fully customizable. However, I’m still having trouble to establish a relyable WiFi connection :-/
Setup
The configuration steps were roughly:
- Change hostname:
sudo nano /etc/hostname - Update everything:
apt-get dist-upgrade - Zeroconf aka Bonjour:
sudo apt-get install avahi-daemon(<hostname>.local) - FileSharing (http://4dc5.com/2012/06/12/setting-up-vnc-on-raspberry-pi-for-mac-access/)
- WLAN:
sudo nano /etc/wpa_supplicant/wpa_supplicant.conf(http://www.maketecheasier.com/setup-wifi-on-raspberry-pi/)-
add:
```
network={
  ssid="<SSID>"
  psk="<password>"
  proto=RSN
  key_mgmt=WPA-PSK
  pairwise=CCMP
  auth_alg=OPEN
}
```
-
- ImageMagick:
sudo apt-get install imagemagick - Install Gosu
- Get Raspicture:
mkdir ~/projects/ && cd ~/projects && git clone https://github.com/sebastianludwig/Raspicture.git - Install other ruby gems using
bundle - Start Raspicture after boot: add
@sudo ruby /home/pi/projects/Raspicture/raspicture.rb 80 /picturesto/etc/xdg/lxsession/LXDE/autostart


